|
|
 |
|
« Swags »
 |
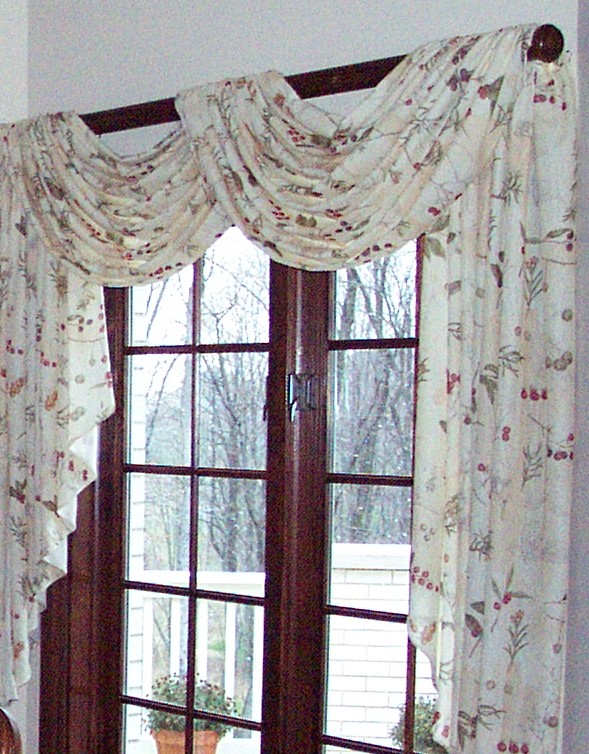
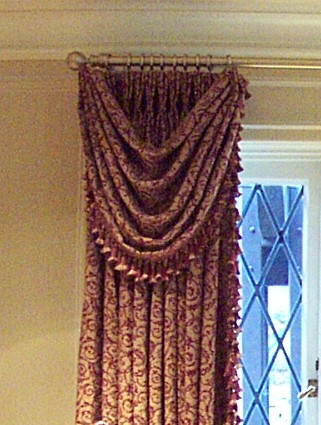
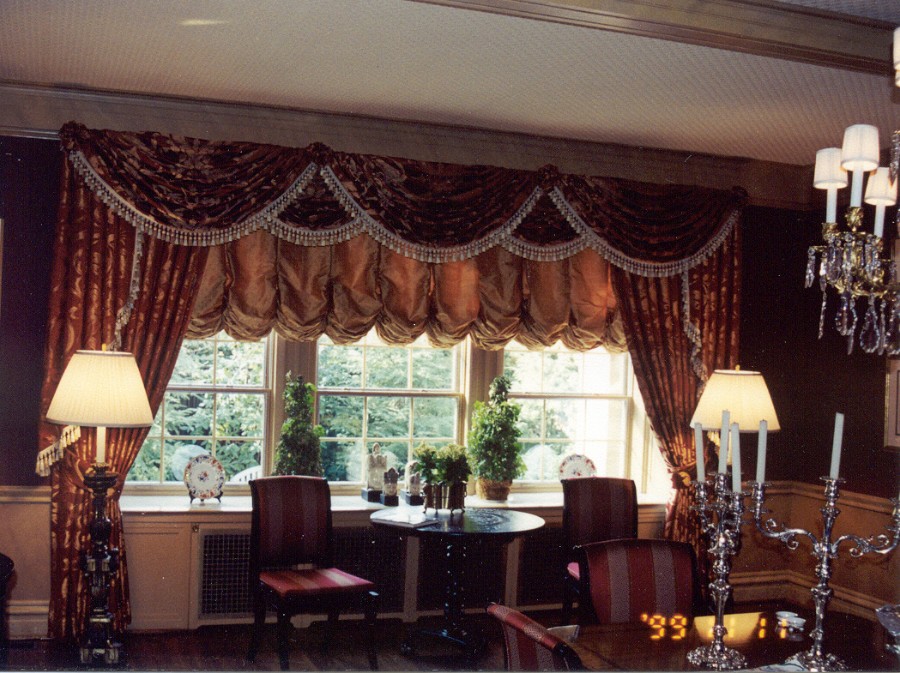
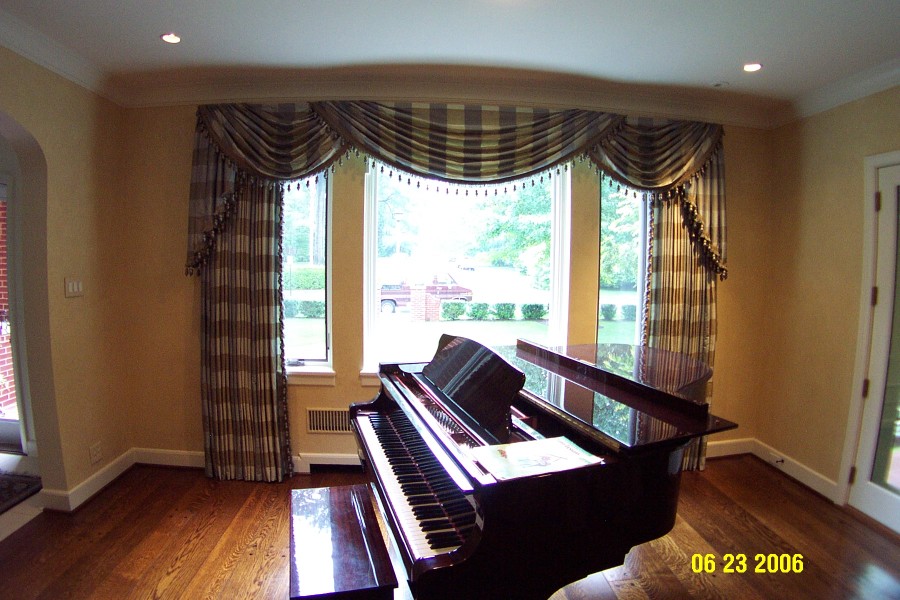
Swags in all different arrangements, have long occupied the center stage of curtain making. Traditionally associated with heavily draped, large scale windows, they have recently translated themselves into a multitude of less formal variations. However, the most beautiful colors, harmonizing admirably together, or the best silk and tassle will lose its charm if the proportion, application and form is not what it should be. |
|
| Swag & Cascade - Anatomy |
|
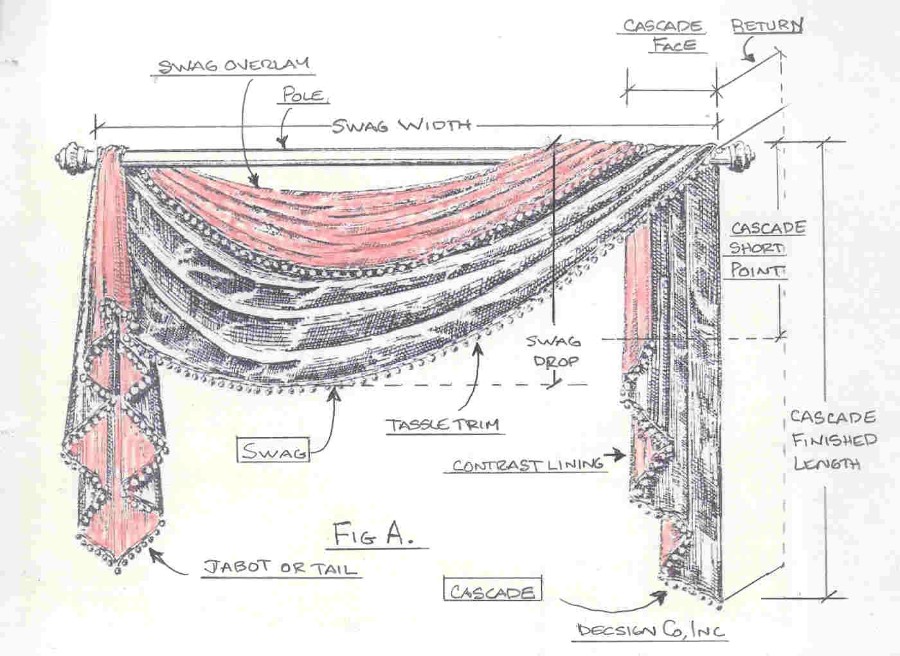
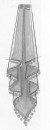
Fig A.
|
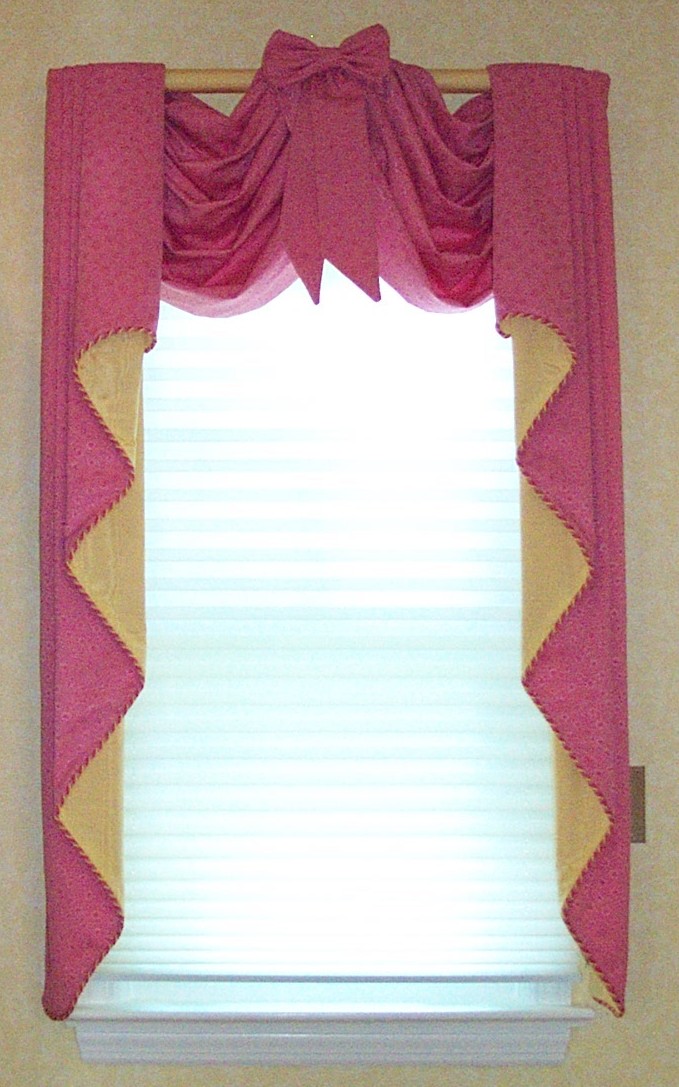
Fig A. illustrates the basic terminology of a Swag & Cascade.
The swag in Fig A. is weighted left of center.
The left side is a double cut cascade, jabot or tail.
The right side is a cascade.
Definitions:
A Swag or festoon is an ornamental drapery or curtain draped in a curve between two points.
A Cascade is a tapered ornamental piece of fabric gathered or pleated and commonly hung under, over, or along side of a swag.
A Jabot is a decorative piece of fabric shaped into cones, tails, ties, pipes or flutes and hung between or on the sides of swags. | |
| Proportion - Swags |
| Swag Drop - How long is an appropriate swag drop? |
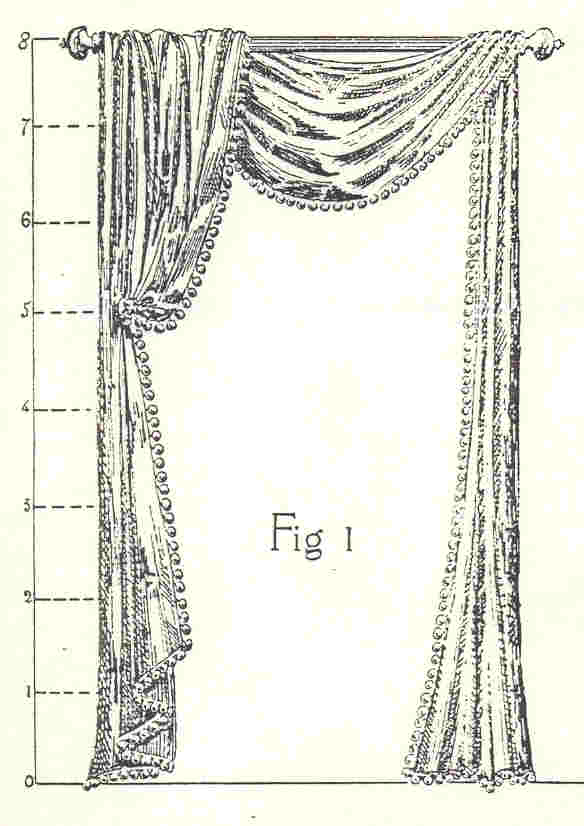 |
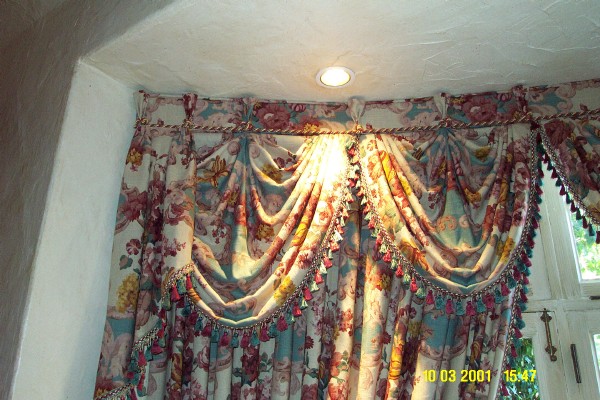
As a general rule of thumb, the swag drop should never exceed 1/4 or (.25) of the overall height of the treatment.
In Fig 1, the scale height of the treatment is eight foot. The swag (draped part across the pole) does not exceed 2/8's or 1/4 of the overall height. The overall swag drop (including the tassle trim) is around 21" and is a proper proportioned swag. The multiplier used to acheive this drop is 1/5 or .20—> 96" x .20 = 19.20 + 1.5" for tassle trim = 20.75" or 21" drop.
| Example: Most windows are 84"-90" high. The swag treatment (on pole or board) typically mounts about 4-6" above the window casing. So lets say the top of the treatment is 90" off the floor. Using the 1/5 multiplier from above, we have 90" x .20 or 1/5 = 18" including trim for an over all swag drop. | | |
| Swag Width - How wide or how many swags should be across a window? |
| Explaination here when written. |
| Swag - Styles / Types |
|
|
| Proportion - Cascades |
|
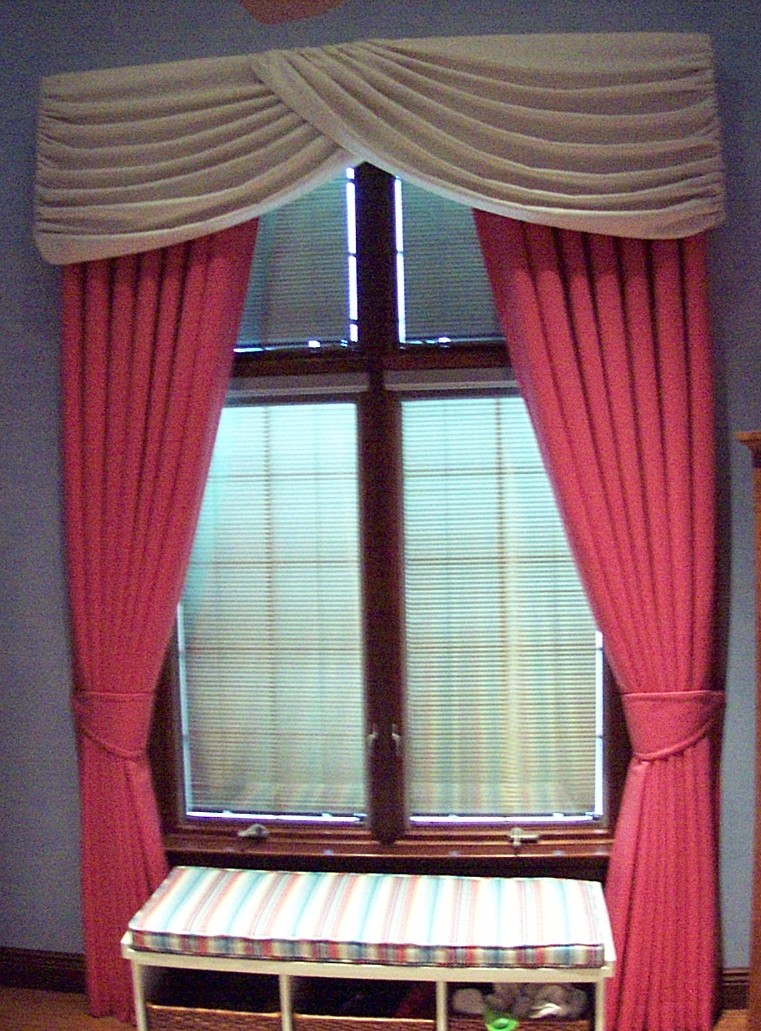
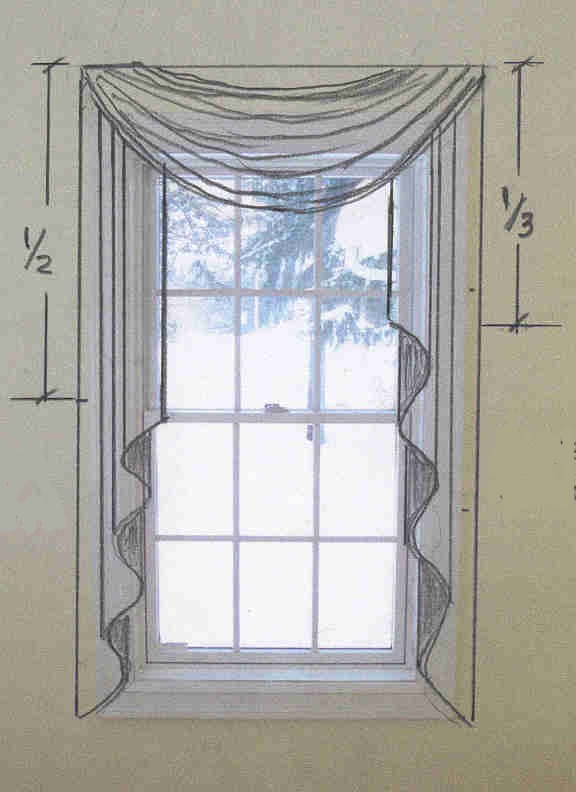
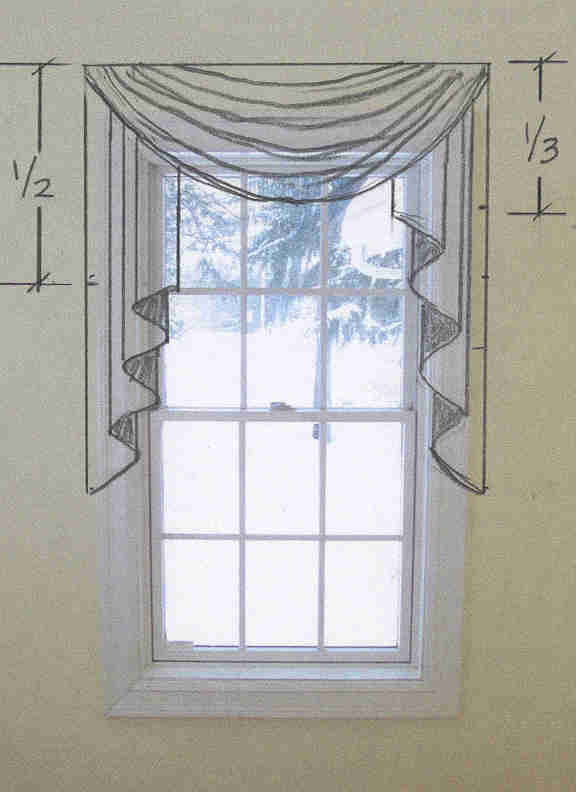
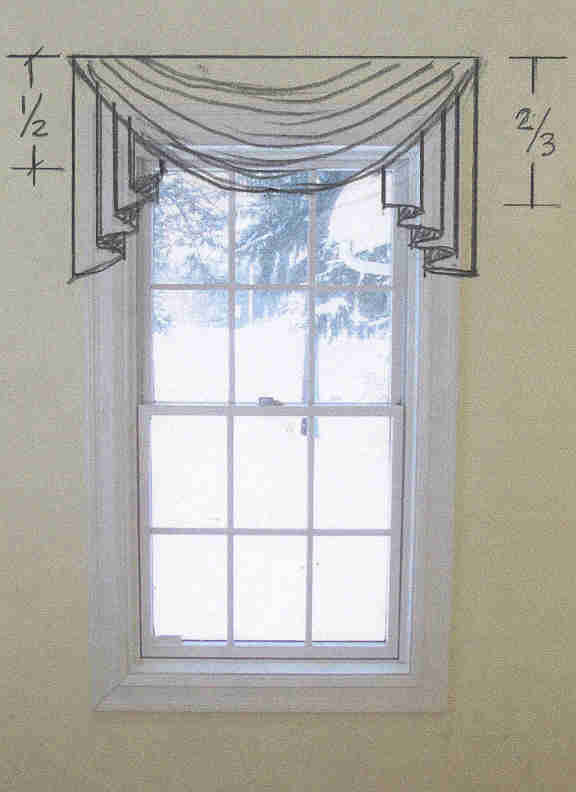
Cascade Length - How long or short to make them?
Cascades can be made in a variety of lengths. The illustrations below show varying cascade lengths in relation to the window length and are usually expressed as a ratio of coverage. This ratio can apply to the length of the window or the overall floor to ceiling height. For example, if the length of a window is 60" long and the cascade coverage is 2/3's then 2/3's of 60" is a 40" long cascade.
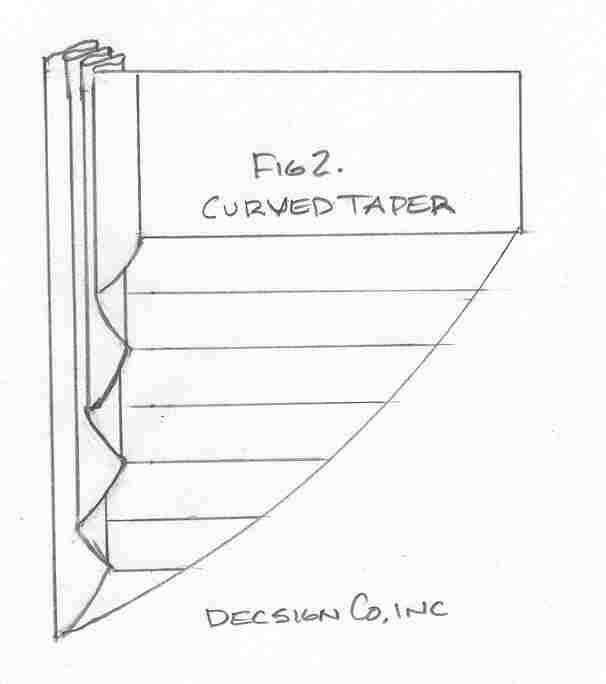
The cascade taper is also expressed as a ratio. This ratio describes how far down from the top of the cascade the angle of the cascade will start.
|
|
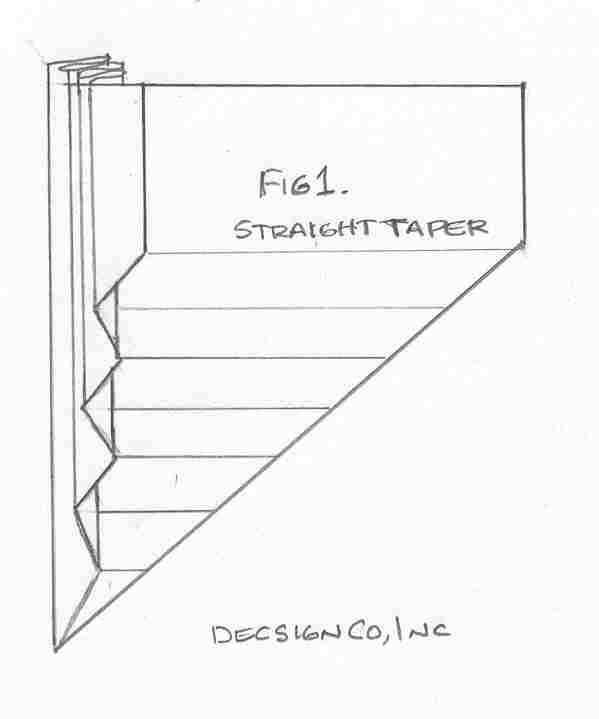
Cascade Tapers
Cascade tapers are available in two basic flavors, straight cut or curve cut. Straight cut will offer a linear feel while a curve cut has softer gracful fold lines.
|
|
The best way to determine proper cascade length and proportion is to draw the treatment to scale. A 3/4" or 1" scale is usually sufficient to read how the treatment will feel on the window. Drawing a treatment to scale has several distinct advantages, the customer is able to see how the treatment will look on their window but the most important being that alterations can be done on paper instead of spoiling the material.
| |

|
|